Chapter 1 of 9
Jump the hurdle & build your first thing
Meet the Terminal, get Claude Code running, build something, deploy it.
This chapter is about jumping the hurdle. You'll use Terminal for the first time and get Claude Code running.
By the end, you'll have a real product on the web, and a setup you can use to build whatever you want next.
This will take about 20 minutes and an initial investment of $20/month for Claude Pro. That includes access to all of Claude, not just coding, so I'm sure you'll find it useful.
Terminal will feel unfamiliar with it's brutal colors, black window, no buttons, just text. That's okay. Once you get past this, you can build whatever you want. The rest of the tutorial will explain everything in depth; this chapter just gets you started.
Before You Start
You need:
- A Mac
- Claude Pro subscription ($20/month)
That's it. Let's go.
1. Open Terminal
Terminal is an app that lets you work with your computer by typing instead of clicking. It's a little weird, but once you get to know it, it's your new best friend.
Find it in Applications → Utilities → Terminal, or search for "Terminal" using Spotlight.
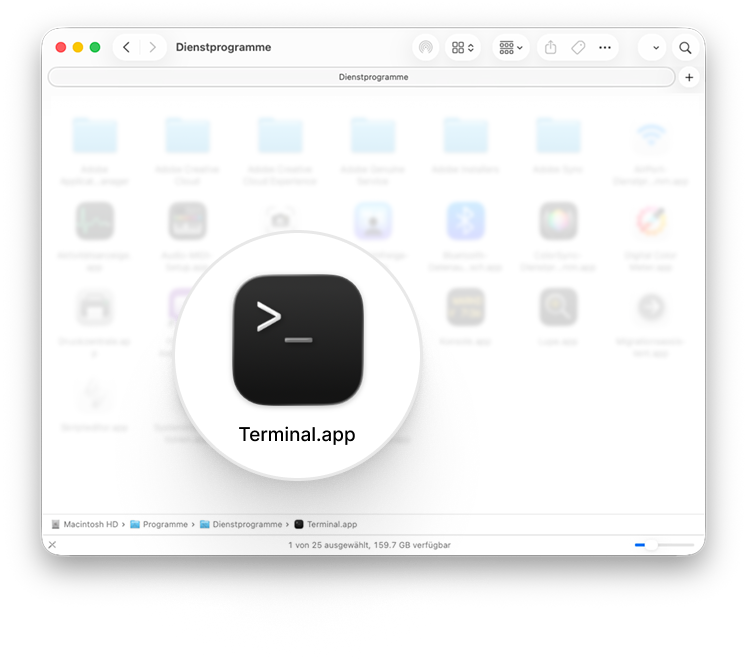
Launch it. You'll see a window with a blinking cursor:
That cursor is waiting for you to type something.
Just to warm up, type ls (as in: "list") and press Enter
You'll see a list of files and folders that exist in the current path (Terminal is always in a path, like a folder in Finder).
Think of Terminal commands as the same actions you do by clicking buttons in apps.
The difference: Terminal has far more commands than any UI has buttons. There are countless powerful commands and you can install tools, run servers, deploy websites, automate repetitive tasks. Every developer tool speaks Terminal. That's why we use it, and why Claude Code runs here.
2. Set Up Your Folder
Time for the next terminal command. Copy this, paste it into Terminal, and press Enter:
mkdir ~/my-first-app && cd ~/my-first-appPaste this and press Enter.
In plain English: "Make directory my-first-app, then change directory into it."
Want to see the folder you just created? Type this and don't forget the dot:
open .Hit Enter. A Finder window opens showing your (empty) project folder.
🎉 If you made it this far, the hardest part is over.
3. Install Claude Code
Now for the fun part: Installing Claude Code. It's an AI that runs in your terminal. You talk to it in plain English, and it does the work: writing code, creating files, installing tools, running commands.
Claude Code can do anything in the terminal that a human can, and it knows all the commands. By running it in your project folder, you're giving an AI access to that folder with an almost unlimited toolkit.
That means you need to understand and trust what's happening. It's extremely unlikely, but theoretically, Claude could delete files from your computer. This is why the rest of the tutorial exists: so you know what you're approving. Claude will ask permission before doing anything significant. You can always say no, or ask it to explain first.
Hint: Any command that starts with "rm" (as in: "remove") will delete files. Be careful with that. But also: Don't worry too much, Claude is programmed to not delete anything without your permission.
That said, let's finally install Claude Code. Copy this command and paste it into Terminal:
curl -fsSL https://claude.ai/install.sh | bashPress Enter. It might take a moment before anything appears. That's normal. As long as you don't see your cursor, something is running.
When installation finishes, you might see a message about adding something to your PATH. If you see a line starting with echo 'export PATH=...
Copy that line, paste it as a Terminal command and press Enter. Easy to miss but important.
When you run the "echo..." command, you won't see any confirmation. This is normal, you can continue with the next command:
Check it worked: Type claude --version. You should see a version number.
4. Start Claude Code
Claude Code is installed. Now we have to run it. It's like opening an app, only this app runs in the terminal.
claudeThe first time you run claude, it walks you through some setup:
- Theme — Pick dark or light mode. Just pick what matches your terminal.
- Login method — Select "Claude account with subscription" (option 1). This opens a browser window. Sign in with your Claude Pro account.
- Security notes — Press Enter to continue.
- Terminal setup — Use the recommended settings (option 1).
Most of these are just "press Enter" or "press 1". The important part comes next.
Claude will ask for confirmation to work in this folder:
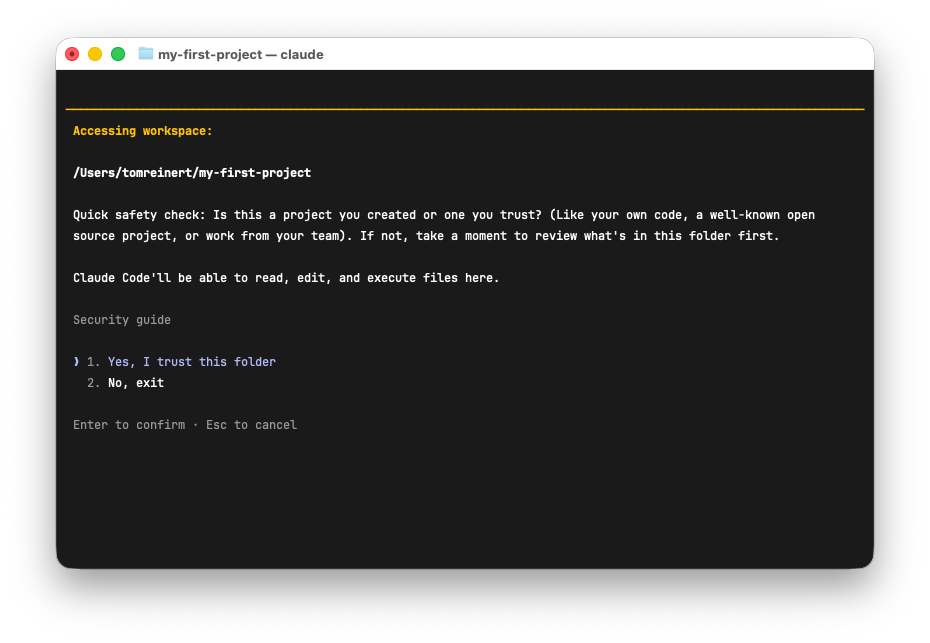
This happens for every new project folder. It's a safety check. Before you confirm, glance at the folder path. Does it say my-first-app? Good. You're in the right place.
If you see the wrong folder, press 2 to exit, type cd ~/my-first-app to get to the right place, then run claude again.
Once confirmed, you'll see Claude ready and waiting:
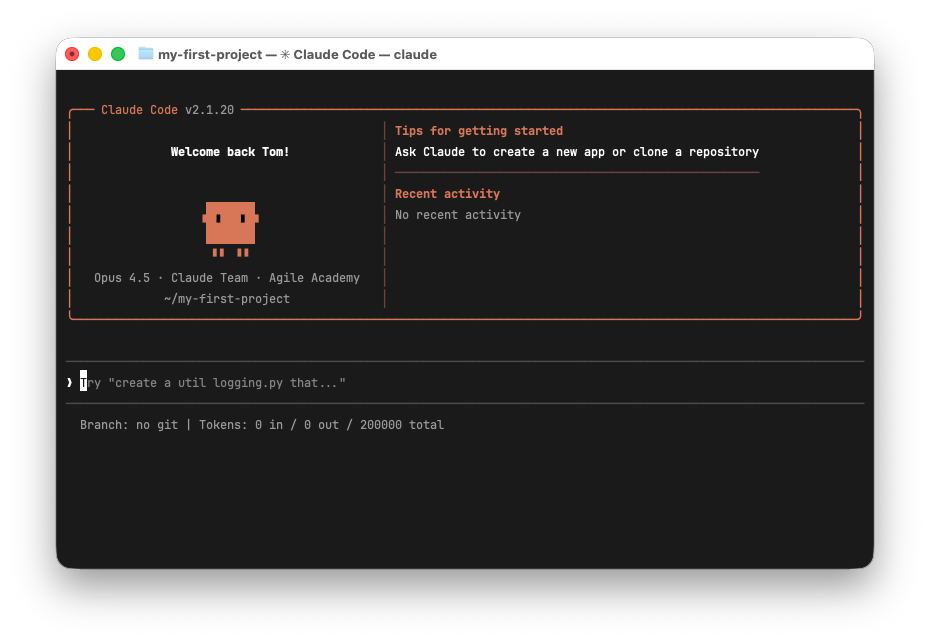
You're now in a chat. If you've used ChatGPT or similar tools, this will feel familiar. There's your input, and you talk to Claude like in any chat interface.
Feel free to say hi first. Claude is built for programming, so it tends to jump into building things. But you can also just chat: "No coding, let's just talk: how are you today?" Claude Code is the same Claude you might know from claude.ai, just running in your terminal with access to your files.
5. Build Your App
Now for the magic. Tell Claude what to build. Here's an example, but feel free to describe anything you want:
Create a personal website for a product designer with a hero section, an about section, and a contact form. Add a dark mode toggle.Tipp: Give Claude some context like a PDF, your resume, a website url, some images, a recent design project you did. You can just drop files in the project folder and tell Claude to look at them.
Or describe something else entirely:
- An app idea you've had
- A tool that would make your life easier
- A landing page for your client
- Literally anything
Watch Claude work. It will create files, write code, and set up everything needed. If Claude asks questions, answer naturally. "Yes, that sounds good" or "Make the background darker." Claude understands plain English.
During your first build, Claude will maybe ask to install some tools, for example:
- Homebrew — A tool that installs other tools. Think of it as an app store for yourTerminal.
- Node.js / npm — Runs JavaScript code. Most modern web projects need it.
These are standard, safe tools that millions of developers use daily. Say yes. The tools stay on your Mac and you can use them for other projects later.
Sometimes Claude will ask you to run an install command in a separate terminal window. No problem. Just open a new Terminal window (Cmd+N). It's like having multiple browser tabs. Each terminal window has its own location and runs independently.
If something goes wrong during installation, ask Claude. That's the beauty of having it running. You now have an expert to ask about anything. "This install failed, what do I do?" works great.
When Claude is done, ask it to preview:
Start the dev server so I can preview thisClaude will give you a URL (usually http://localhost:3000 or similar). Open it in your browser.
You have a website. Click around. This is real code that you directed an AI to build.
Right now it's only available on your computer (your localhost). We'll deploy it to the internet in the next step.
6. Deploy to the Internet
Your website only exists on your computer. Let's put it online.
Help me deploy this to VercelVercel is a hosting platform. It puts your website on the internet so anyone can visit it. Free for personal projects.
Claude will walk you through the process:
- Creating a free Vercel account (just needs an email)
- Connecting your project
- Deploying with one command
This might involve a few back-and-forths. Claude may open browser windows for you to sign up or authorize things. Just follow along.
When done, you get a real URL like
https://my-first-app-abc123.vercel.app
Vercel's free tier is generous. Your site stays online indefinitely. You can connect a custom domain later if you want a nicer URL.
Open it on your phone. Show someone. It's live. Anyone can see it.
What Just Happened
You opened Terminal, installed Claude Code, built a website, and deployed it to a live URL. That's the core workflow: describe what you want, Claude builds it, you ship it.
You probably approved some things without fully understanding them. That's okay for now. Part 2 explains what's actually happening: what Terminal is, how files are organized, why Git exists. So you can work confidently, not just hope things work.
Part 1 complete. Hurdle jumped.
You now have a live website and the basic workflow down. Part 2 goes deeper into understanding the environment.
Get notified when Part 2 is ready